Settings
Open Settings from the dashboard sidebar to configure your Rentalot account. Settings has 8 tabs: General, Notifications, Scheduling, Public Pages, Integrations, API Keys, Voice Agent, and Account.
Most tabs have a save button at the bottom. Changes aren’t applied until you save.
General
Your profile and how you appear to prospects.
- Photo: upload or remove your profile photo (under 5 MB)
- Name: shown to prospects and in emails
- Email: your sign-in email. To change it, contact support.
- Agent Name: how your AI agent introduces itself. Defaults to your name if empty.
- Email Sign-Off: closing line for outgoing emails
- Language: the display language for your dashboard
Coming soon: the Follow-ups and Contact Nudges sections on this tab control automations that haven’t launched yet. See Follow-ups & Nudges.
Notifications
Email Notifications
Choose which emails you get from Rentalot:
- Product updates & newsletter: new features, tips, and announcements
- Application completed: a prospect completed pre-screening
- Unreviewed application reminder: a reminder if a completed application hasn’t been reviewed, sent after the delay you set in Remind after
- New inquiry: a new inquiry came in from a prospect
- Showing booked: a showing was scheduled for one of your properties
- Follow-up due: an automatic follow-up is about to be sent (for when automatic follow-ups launch)
- Notify prospect on review: email the prospect when you approve or deny their application
- Email prospect matching properties: after pre-screening, email the prospect listings that match their preferences. Requires a connected email account.
- Send booking link emails: show a Send booking link button on contact pages. Requires a Scheduling URL or Cal.com.
- Account notifications: always on (billing and security alerts)
In-App Notifications
Choose what appears in your notification bell: New inquiry, New message, Showing booked, Showing cancelled, Pre-screening completed, Bulk import completed, and Contact updated (this one can be noisy).
Scheduling
Showing length, your scheduling link, and availability limits. See Showings.
- Showing Duration: default length of a showing (30, 45, or 60 minutes)
- Scheduling URL: if you don’t use Cal.com, paste any scheduling link (a Google Calendar appointment schedule, Calendly, and so on). Prospects see it on your public pages after they complete pre-screening.
Availability
- Timezone: used for showing times
- Working Hours: the days and hours you’re available
- Buffer between showings: minimum gap between back-to-back showings (15, 30, or 60 minutes)
- Max showings per day: cap on showings booked in one day (1–20, default 10)
Public Pages
Your public profile and prospect link.
Visibility
- Profile page visible: turns your public profile at
/p/your-slugon or off - Public prescreening enabled: lets prospects complete pre-screening at your prospect link. This is the same switch as Publish your prospect link on the dashboard checklist.
Phone Number
Show a Call button on your profile, pre-screening, and completion pages so prospects can reach you directly.
- Phone number: the number the button calls
- Show call button on public pages: stays disabled until you enter a phone number
Your number isn’t in the page source. When a prospect clicks the button, a background human-verification check runs before the number is revealed as a tap-to-call link.
URL Slug
Your unique slug for public URLs, such as rentalot.ai/p/your-slug. Use 3–40 characters: lowercase letters, numbers, and hyphens. Click Update slug to save it; it saves separately from the rest of the tab. Your prospect link is /p/your-slug/prescreening and your listings page is /p/your-slug/listings.
External Link
Add a link to another page, such as your Zillow listings or personal website. Enter a URL and a Label, then choose where it appears:
- Show on profile page
- Show after prescreening completion
Both switches stay disabled until you enter a URL. Clearing the URL turns them both off.
Coming soon: the Chat Agent section (welcome message and starter suggestions) customizes a free-form prospect chat page that hasn’t launched yet.
Integrations
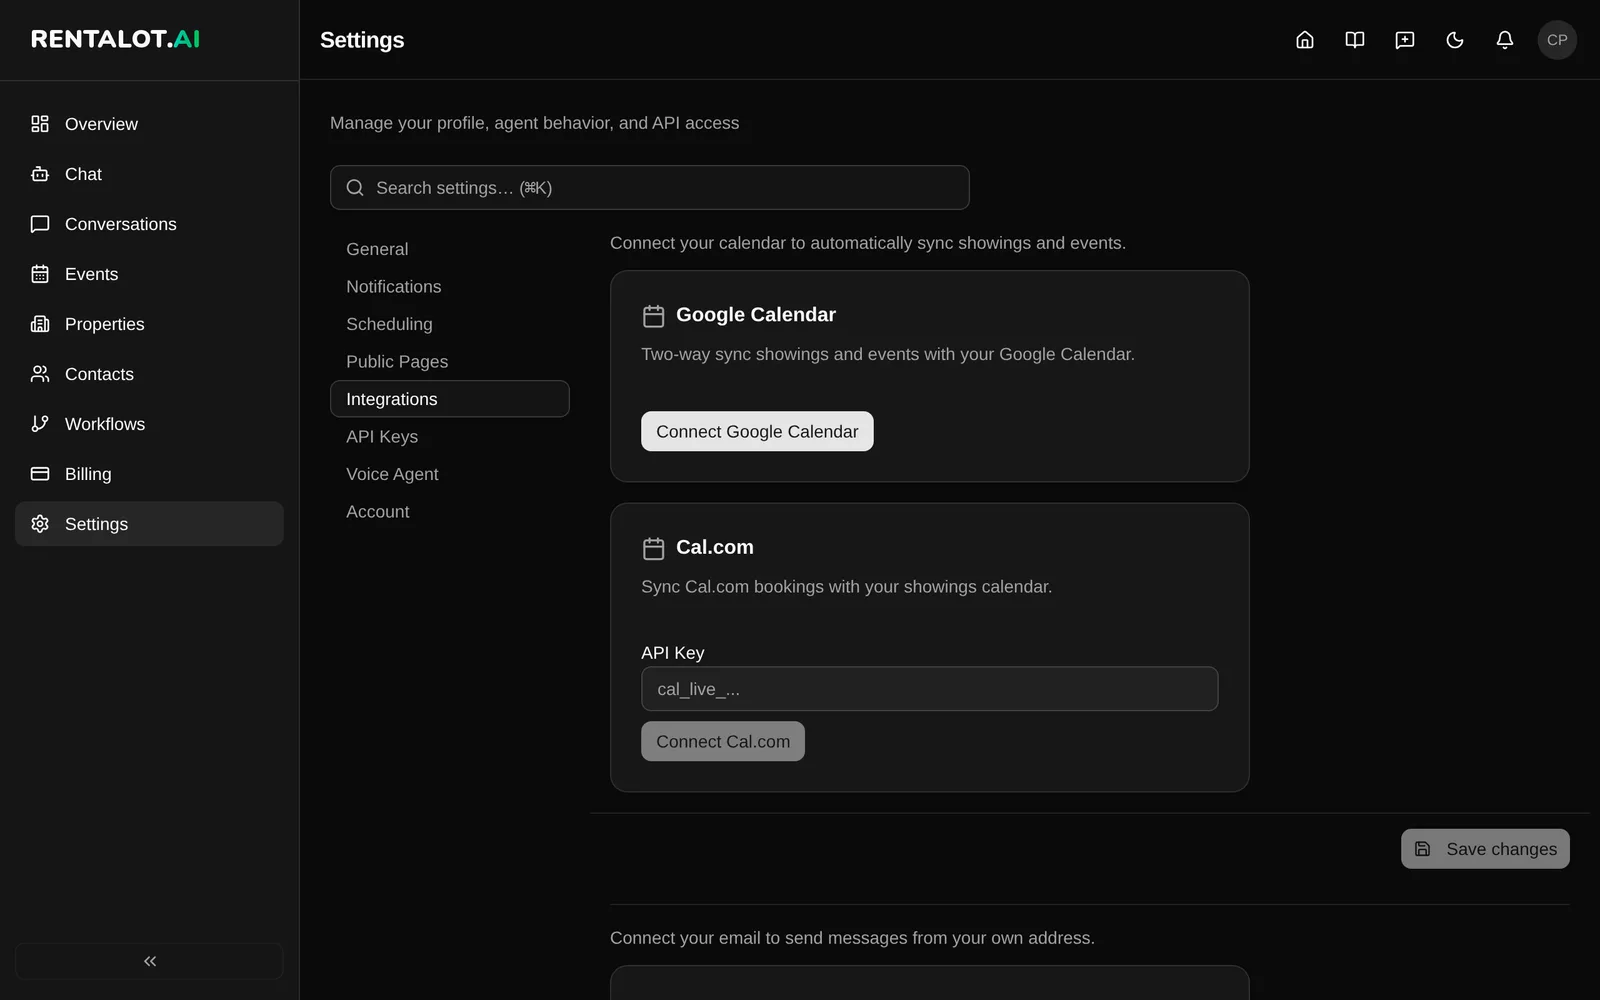
Calendar and email connections. Both require the Starter plan or higher.
Calendar
- Google Calendar: two-way sync of showings and events
- Calendar for showings: once Google Calendar is connected, choose which calendar new showings go to. The default is your primary calendar.
- Cal.com: sync Cal.com bookings with your showings calendar
- Gmail, Microsoft 365, or Custom SMTP: send email to prospects from your own address. See Email.
- Listing expiry reminders: turn on Email me about my listing expiry dates to get reminders 7 days before, 1 day before, and when a listing expires.
Coming soon: Auto-Send, which lets the AI send emails without your review. Emails still wait for your review today.
API Keys
Click Generate Key, give it a Key Name, and copy the key right away. It won’t be shown again. Revoke a key at any time; integrations using it stop working immediately.
Starter includes read-only API access. Pro and Scale include read and write access. See the API Reference and Authentication.
Voice Agent
Voice pre-screening lets prospects on your public pages talk to an AI voice agent instead of typing.
- Enable voice pre-screening: show the voice option on your public pages
- Allow international phone numbers: accept non-US phone numbers during voice conversations
- Voice pre-screening URL: the page where prospects see Start Voice Conversation first, with the text form as a fallback
- Custom instructions: context about your company, rules, or tone, added to the voice agent’s instructions
- Custom greeting: replaces the voice agent’s opening line. Leave it empty to use the default.
Account
- Export My Data: download a JSON file with all your properties, contacts, conversations, events, and workflows
- Delete account: permanently deletes your account and all its data. You’ll need to type
DELETEto confirm. This can’t be undone.